House Cleaning Tips & Services in Milford, NH

Stay informed with expert cleaning tips, home care advice, and insights from Tidy Cleaning Services in Milford, NH. Explore practical guides, service information, and helpful resources designed to keep your home cleaner, healthier, and easier to maintain year-round.

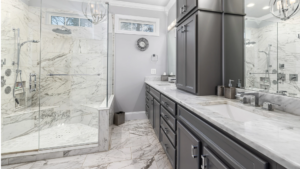
Bathroom after a remodeling project, cleaned and sanitized

How Often Should I Deep Clean My House?

Keeping up with everyday cleaning helps your home look tidy, but some areas need more attention than a quick wipe or weekly vacuum. Grease collects behind appliances, dust settles on ceiling fans, and dirt builds up in places you rarely think to clean. Even with a regular cleaning routine, these areas can become harder to maintain over time.

So, how often should I deep clean my house? For most households, a thorough deep cleaning every three to six months is a reasonable starting point. However, kitchens, bathrooms, and high-traffic areas often need extra attention year-round. The right schedule depends on how many people live in your home, whether you have pets, and how consistently you handle everyday cleaning.

How Often Does Your House Really Need a Deep Clean?

Most homes benefit from a complete deep clean every three to six months, but not every surface needs the same attention. Some areas collect dirt quickly, while others can go several months without becoming noticeably dirty.

A regular cleaning routine covers tasks such as vacuuming, mopping, wiping countertops, and cleaning bathrooms. Deep cleaning goes further by addressing buildup in overlooked spaces, removing stubborn grime, and cleaning surfaces that aren’t part of your weekly routine.

For example, you might wipe down your kitchen counters every day but only clean behind your refrigerator a few times a year. Similarly, bathroom sinks need frequent cleaning, while exhaust fans and grout may only need occasional deeper attention.

A practical deep cleaning schedule generally looks like this:

  • Monthly: Clean frequently used appliances, remove buildup from bathroom fixtures, wash washable rugs, and dust overlooked surfaces.
  • Every three to six months: Deep clean kitchens and bathrooms, wash baseboards, clean behind accessible furniture, and address dirt in hard-to-reach areas.
  • Once or twice a year: Clean behind major appliances when safely accessible, wash curtains according to their care instructions, and inspect areas that rarely receive attention.

These are starting points rather than strict rules. If your home has pets, young children, or heavy daily activity, you may need to do certain tasks more often.

Factors That Affect How Often You Should Deep Clean

Two homes of the same size can have very different cleaning needs. A household with several people and pets will usually collect more dirt than a home occupied by one person.

Instead of following a schedule that doesn’t fit your lifestyle, consider how your household uses each room and which areas become dirty the fastest.

Homes With Pets or Young Children

Pets and young children can make regular deep cleaning more important. Pet hair collects under furniture, muddy paws leave marks on floors, and food spills can reach easy-to-miss spots.

If you have pets, vacuum furniture and floors frequently and pay attention to pet bedding, baseboards, and corners where hair gathers. Homes with young children may need more frequent cleaning around play areas, dining spaces, and frequently touched surfaces.

You don’t necessarily need to deep clean the entire house every month. Focus on the areas where messes happen most often, and schedule a more thorough cleaning when regular maintenance stops being enough.

Household Size and Daily Foot Traffic

The more people who live in your home, the faster dirt and grime tend to accumulate. Entryways, kitchens, bathrooms, and living rooms usually get the most traffic, so they may need deeper cleaning more often than guest bedrooms or storage spaces.

For example, a bathroom shared by five people will generally need more attention than one guests use occasionally. The same applies to kitchens where several meals are prepared every day.

Focus on each room’s condition rather than cleaning everything on the same schedule. You may find that your kitchen needs a monthly deep cleaning while your guest room only needs one every few months.

Allergies, Dust, and Indoor Air Quality

Dust can collect on ceiling fans, vents, blinds, and upholstered furniture even when your home looks clean. These areas are easy to miss during regular cleaning, especially when they’re difficult to reach.

If someone in your household has allergies or sensitivities to dust, keeping these surfaces clean may help reduce exposure to common indoor allergens. Vacuuming with a suitable filter, washing bedding regularly, and damp-dusting surfaces can help keep particles from accumulating.

You may need to adjust your cleaning frequency during periods of heavy pollen, increased shedding, or home renovations. Regularly checking dust-prone areas makes it easier to decide when you need a deeper clean.

Room-by-Room Deep Cleaning Schedule

Not every room needs the same cleaning frequency. Kitchens and bathrooms deal with moisture, food residue, and frequent use, while bedrooms and living areas tend to collect dust, hair, and dirt in less visible places.

A room-by-room deep cleaning schedule helps you prioritize the areas that need attention without spending an entire weekend cleaning everything at once.

The following table provides a starting point for planning your household cleaning routine.

Room or Area Suggested Deep Cleaning Frequency Tasks to Prioritize
Kitchen Every 1–3 months Oven, refrigerator, cabinet fronts, backsplash, and appliance exteriors
Bathrooms Every 1–3 months Grout, shower doors, exhaust fans, fixtures, and hard-to-reach areas
Bedrooms Every 3–6 months Under beds, baseboards, blinds, and mattress care
Living Areas Every 3–6 months Upholstery, furniture, ceiling fans, and window coverings
Laundry Room Every 3–6 months Washer, dryer lint areas, shelving, and floor corners
Closets and Storage Areas Every 6–12 months Shelves, floors, stored items, and dust buildup

These intervals refer to deeper tasks, not routine cleaning. Floors, countertops, toilets, and other frequently used surfaces still need regular attention between deep cleans.

Kitchen Deep Cleaning

Kitchens need frequent attention because grease, food residue, and moisture can build up in areas everyday cleaning doesn’t reach. Cooking regularly can leave a film on cabinet fronts, range hoods, backsplashes, and nearby surfaces.

Plan a deeper kitchen cleaning every one to three months, depending on how often you cook. Focus on the oven, refrigerator shelves, cabinet doors, and the areas around appliances. Wipe down surfaces with products appropriate for their materials, and follow manufacturer instructions when cleaning appliances.

You can also divide larger jobs throughout the month. For example, clean the refrigerator one weekend and the oven the next. This keeps buildup under control without requiring several hours of cleaning at once.

Bathroom Deep Cleaning

Bathrooms deal with moisture, soap residue, hard water, and frequent use. Even when sinks and toilets are cleaned weekly, grime can collect along grout lines, around fixtures, and in areas that stay damp.

A thorough bathroom cleaning every one to three months is a useful starting point. Pay attention to shower doors, tile grout, faucet bases, and exhaust fan covers. If your bathroom has poor ventilation or heavy daily use, some of these areas may need attention sooner.

You can reduce how often these surfaces need extra scrubbing by keeping up with a few simple habits. Wiping down wet surfaces after showering, running the exhaust fan, and regularly removing soap residue are practical ways to keep your bathroom cleaner longer. These small tasks help prevent buildup and make your next deep cleaning easier.

Deep Cleaning for Bedrooms and Living Areas

Bedrooms and living rooms may not develop the same grease or moisture problems as kitchens and bathrooms, but they still collect dust, pet hair, and dirt. Upholstered furniture, curtains, blinds, and spaces underneath beds can become especially dusty over time.

Deep cleaning these rooms every three to six months is generally reasonable. When practical, move lightweight furniture, vacuum under beds and sofas, wipe baseboards, and clean window coverings according to their care instructions.

Mattresses and upholstered furniture may also need attention. Vacuum surfaces using an appropriate attachment, and treat stains only with products recommended for the material. Avoid soaking mattresses or upholstery, since trapped moisture can cause additional problems.

If you have pets or spend a lot of time in these rooms, inspect them more frequently. A living room used every day may need deeper cleaning sooner than a bedroom that’s rarely occupied.

Laundry Rooms, Closets, and Other Overlooked Spaces

Laundry rooms and storage areas are easy to forget because they aren’t always part of your regular cleaning routine. However, lint, dust, detergent residue, and moisture can build up over time.

Clean your washing machine according to the manufacturer’s recommendations, including any maintenance cycles and accessible detergent dispensers. Remove lint from the dryer filter after each load, and inspect the surrounding area for buildup. Dryer vent maintenance may require a qualified professional.

Closets and storage spaces can usually be deep cleaned less frequently. Every six to twelve months, remove items from accessible shelves, wipe surfaces, vacuum floors, and check for moisture or dust accumulation.

You can also use these cleaning sessions to organize stored belongings and remove items you no longer need.

Signs Your House Needs a Deep Cleaning Sooner

A cleaning schedule is helpful, but your home’s condition matters more than the date on your calendar. Sometimes, dirt builds up faster than expected, especially during busy periods or when you delay regular cleaning.

One common sign is dust that keeps returning shortly after you’ve cleaned. If you notice buildup along baseboards, behind furniture, or on vents, those areas may need more attention than your usual routine provides.

Lingering odors are another warning sign. Food residue, dirty fabrics, pet accidents, and moisture can leave smells behind even when visible surfaces look clean. Finding and cleaning the source is more effective than covering the odor with air fresheners.

You may also notice grease on kitchen cabinets, soap scum on shower doors, or dirt collecting around fixtures. These problems become harder to remove when they’re left untreated for long periods.

If several rooms have noticeable buildup, it may be time for a whole-house deep cleaning. If only one area is affected, focus on that space instead of waiting until your next scheduled deep clean.

Your Home Deep Cleaning Checklist

A home deep cleaning checklist makes it easier to track the tasks that don’t get completed during regular maintenance. Instead of trying to remember every surface that needs attention, you can work through each room and check off tasks as you finish them.

Use the following deep clean list for your house as a starting point. Some tasks may need to be completed monthly, while others can wait until your next seasonal cleaning.

Kitchen Deep Cleaning Checklist

  • Clean the inside of the oven according to the manufacturer’s instructions.
  • Remove food residue from refrigerator shelves and drawers.
  • Wipe cabinet doors, handles, and accessible cabinet interiors.
  • Degrease the backsplash and areas around the stove.
  • Clean the microwave interior and exterior.
  • Wipe down small appliances and remove crumbs underneath them.
  • Clean the sink, faucet base, and drain opening.
  • Vacuum and mop underneath movable furniture and appliances when safe.

Bathroom Deep Cleaning Checklist

  • Scrub shower walls, bathtub surfaces, and tile grout.
  • Remove soap scum and hard water deposits with suitable products.
  • Clean around faucets, drains, and toilet bases.
  • Wash or replace shower curtain liners as needed.
  • Clean bathroom mirrors and accessible light fixtures.
  • Remove dust from exhaust fan covers according to manufacturer instructions.
  • Wipe bathroom cabinets, drawers, and shelving.
  • Wash bath mats and other washable bathroom fabrics.

Bedroom and Living Area Deep Cleaning Checklist

  • Vacuum under beds, sofas, and other accessible furniture.
  • Dust ceiling fans, blinds, and window frames.
  • Wipe baseboards, doors, and frequently touched surfaces.
  • Vacuum upholstered furniture and removable cushions.
  • Wash bedding, blankets, and washable decorative covers.
  • Clean curtains or other window coverings according to their care labels.
  • Vacuum mattresses and inspect them for stains.
  • Clean corners and other areas where dust collects.

Other Deep Cleaning Tasks You Shouldn’t Forget

  • Clean washing machine dispensers and run recommended maintenance cycles.
  • Remove lint and dust from accessible laundry room surfaces.
  • Wipe closet shelves and vacuum storage areas.
  • Clean interior windows and accessible window tracks.
  • Dust air vents and replace HVAC filters when needed.
  • Wipe light switches, door handles, and frequently touched fixtures.
  • Clean entryway mats and areas around exterior doors.
  • Check overlooked spaces for moisture, stains, or unusual odors.

You don’t have to finish every item in one day. Use this list to identify what needs attention, then spread the work across several cleaning sessions. For tasks that take more effort, such as removing stubborn grease, cleaning appliances, or reaching neglected areas, using the right deep-cleaning methods can help you get better results without spending unnecessary time scrubbing.

How to Build a Deep Cleaning Schedule That Works

A deep cleaning schedule is easier to maintain when it fits around your regular responsibilities. Trying to clean every room from top to bottom in one weekend can be exhausting, especially if you’ve fallen behind on routine maintenance.

Start by identifying which tasks need monthly attention and which can wait several months. Then assign a few deep cleaning jobs to specific weeks. You might clean kitchen appliances during the first week of the month, focus on bathroom grout and fixtures during the second, and tackle bedrooms or living areas later.

Keep your weekly cleaning routine separate from these larger jobs. Keep vacuuming, mopping, washing dishes, and wiping frequently used surfaces going between deep cleans. If you’re unsure how to organize those tasks, a weekly house cleaning schedule can help you divide regular chores into manageable sessions.

You can also keep your deep clean schedule in a calendar or checklist app. Set reminders for tasks that are easy to forget, such as cleaning blinds, checking appliance maintenance needs, or washing curtains.

Some people find cleaning videos helpful when tackling unfamiliar jobs, particularly appliance maintenance or delicate materials. Choose instructions from the manufacturer or another reliable source, and check that the recommended methods are safe for your specific surfaces.

The most useful deep cleaning schedule for your home is one you can follow consistently. If a task takes longer than expected or a room needs attention sooner, adjust the plan rather than trying to follow it perfectly.

When to Schedule Professional Deep Cleaning

Deep cleaning takes more time than regular house cleaning because it involves areas that are often overlooked. Moving lightweight furniture, removing buildup, and working through several rooms can turn into a full-day project.

Professional deep cleaning may be worth considering if your home has accumulated significant dirt, you haven’t done a thorough cleaning in several months, or your schedule makes it hard to keep up with larger tasks.

It can also be helpful before hosting guests, after a particularly busy season, or when you want to return to a more manageable cleaning routine. Starting with a thoroughly cleaned home can make everyday maintenance easier.

If you’re considering professional help, ask which tasks are included before scheduling. Deep cleaning services vary, and specialized jobs such as carpet extraction, mold remediation, or appliance repairs may require separate providers.

You can also combine professional cleaning with your regular household routine. A professional visit every few months, along with consistent weekly maintenance, may be a practical option for households that struggle to find time for deeper cleaning.

Keep Your Home Fresh With Tidy Cleaning Services

You don’t need to deep clean your entire house every weekend to keep it comfortable. A realistic schedule, regular maintenance, and occasional attention to overlooked areas can help prevent dirt and grime from getting out of hand.

If you’re ready to give your home some extra attention, Tidy Cleaning Services can help. Our deep cleaning services help address built-up dirt and neglected areas, making it easier to maintain a clean home between visits.

Contact Tidy Cleaning Services to schedule your next deep cleaning and enjoy a fresher, more comfortable living space.


How to Remove Pet Odor From Your House

Living with pets means dealing with the occasional mess, but lingering odors can make your home feel dirty even after you’ve cleaned. Pet hair, dander, urine accidents, and the natural oils on your pet’s skin can leave smells behind in carpets, furniture, and other surfaces. Sometimes, opening a window or spraying air freshener isn’t enough to make those odors disappear.

The best way to remove pet odor from your house is to find the source and clean the affected areas properly. Whether you’re dealing with a recent accident or a stubborn odor that’s been around for weeks, the right cleaning methods can help your home smell fresh again without relying on strong fragrances.

Why Do Pet Odors Linger in Your House?

Pet odors often stick around because the source of the smell isn’t always visible. Dogs and cats leave behind hair, dander, saliva, and natural body oils as they move around your home. These substances collect on furniture, bedding, rugs, and floors, especially in places where your pets spend the most time.

Urine accidents can be even harder to deal with. When urine soaks into carpet fibers, padding, or unfinished wood, wiping the surface doesn’t necessarily remove everything underneath. As the remaining residue breaks down, the smell can return, particularly when the area becomes humid.

Soft materials also absorb odors more easily than hard surfaces. A sofa that your dog sleeps on every day may develop a noticeable smell even without a visible stain. The same can happen with curtains, throw pillows, and area rugs.

Removing pet odor from your house means addressing these hidden sources rather than simply covering them with air fresheners.

How to Remove Pet Odor From Your House

The best way to remove pet odor from your house depends on where the smell is coming from. A dirty pet bed needs a different approach than a urine stain in the carpet or odors trapped in upholstery.

Start with the areas your pets use most often, then work through the surrounding surfaces. Cleaning several odor sources together can make a bigger difference than treating just one spot.

Vacuum Carpets, Rugs, and Upholstery Thoroughly

Carpets and upholstered furniture collect pet hair, dander, dirt, and other debris that can contribute to lingering smells. Even if your floors look clean, these particles can settle deep into carpet fibers or become trapped between sofa cushions.

Vacuum carpets and rugs slowly, making overlapping passes instead of rushing across the surface. Pay extra attention to corners, baseboards, and the areas where your pets usually sleep. Use an upholstery attachment to clean sofas, chairs, and cushions, including the spaces underneath removable cushions.

For homes with pets, you may need to vacuum several times a week, especially during shedding seasons. Empty the vacuum regularly and clean or replace its filters according to the manufacturer’s instructions so trapped debris doesn’t contribute to unpleasant smells.

Vacuuming won’t remove urine that has soaked into a carpet, but it helps remove the hair, dander, and everyday dirt that can make pet odors more noticeable.

Use an Enzyme Cleaner to Remove Pet Stains and Odors

Pet accidents can leave behind residue that ordinary household cleaners don’t fully remove. An enzymatic pet stain remover contains ingredients designed to break down certain organic substances associated with urine and other pet messes.

Before applying a cleaner, blot up as much of a fresh accident as possible with paper towels or a clean cloth. Avoid rubbing the stain because this can spread the liquid into surrounding fibers.

Choose an enzyme cleaner labeled for the affected surface and follow the directions carefully. Some products need to remain damp for a specific amount of time to work properly, while others require blotting or rinsing afterward. Always test the product in an inconspicuous area first.

Avoid using ammonia-based cleaners on urine accidents. Ammonia can produce an odor similar to components of urine, which may encourage some pets to revisit the same area.

An enzyme cleaner can be especially helpful for removing pet odor because it targets residue instead of simply adding another scent.

Wash Pet Bedding, Blankets, and Other Fabrics

Pet beds, blankets, and washable furniture covers can develop strong odors because they’re in constant contact with your pet’s fur, skin oils, and saliva.

Check the care labels before washing these items. Remove loose hair first, then use a suitable laundry detergent and the warmest water temperature allowed by the fabric instructions. If the bedding has a removable cover, wash it separately and inspect the inner cushion for stains or odors.

Dry everything completely before returning it to your pet’s sleeping area. Damp bedding can develop musty smells, making the problem worse.

For pets that sleep on your furniture or bed, wash throw blankets, pillow covers, and other frequently used fabrics regularly. Depending on how much your pet sheds and how often they use these items, weekly washing may be helpful.

If a pet bed still smells after repeated washing, the filling may have absorbed too much residue and could need replacing.

Clean Hard Floors and Pet Feeding Areas

Hard floors may not trap odors as easily as carpets, but pet accidents, food spills, and dirty paw prints can still leave behind unpleasant smells.

Sweep or vacuum floors to remove loose hair and dirt before mopping. Use a cleaner approved for your flooring material, paying attention to corners, baseboards, and areas near pet beds or litter boxes.

For sealed hardwood, avoid soaking the floor. Excess moisture can seep into seams and damage the wood. Tile floors are generally easier to clean, although grout may absorb residue if it isn’t properly sealed.

Pet feeding areas also need regular attention. Wash food and water bowls with soap and water, clean the floor underneath them, and wipe up spills promptly. Food residue and standing water can create odors unrelated to urine accidents.

If you’re getting rid of pet odor in your house, these everyday cleaning tasks help remove smaller sources of smell before they accumulate.

Improve Ventilation and Indoor Air Quality

Poor airflow can make pet odors more noticeable, especially in rooms where pets spend most of their time. When windows stay closed and air circulation is poor, smells from bedding, carpets, and furniture can linger.

Open windows when outdoor conditions allow, and use exhaust fans to help remove stale or humid air. If your home has a heating or cooling system, replace or clean its filters according to the manufacturer’s recommendations.

An air purifier with a HEPA filter can help capture airborne particles such as pet dander. Models with a substantial activated carbon filter may help reduce some odors, although they won’t remove smells trapped in carpets or furniture.

Ventilation works best alongside regular cleaning. Fresh air may make a room smell better temporarily, but it won’t eliminate pet odors if the original source remains untreated.

How to Get Rid of Pet Urine Smell

Urine is one of the most difficult pet odors to remove because it can soak below the visible surface. Even a small accident on a rug or floor may leave residue behind after the area looks completely clean.

The sooner you treat the accident, the better your chances of preventing a lasting smell. However, older stains may still respond to appropriate cleaning methods, depending on how deeply the urine has penetrated.

How to Remove Urine Smell From Carpet

Carpet fibers absorb liquids quickly, and urine can travel into the padding underneath. That’s why cleaning only the visible stain may not completely solve the problem.

For a fresh accident, press clean paper towels or an absorbent cloth onto the affected area to soak up as much liquid as possible. Apply gentle pressure rather than scrubbing, which can push the liquid deeper into the carpet.

Next, use an enzymatic pet stain remover that is safe for your carpet. Follow the label instructions for application, dwell time, and drying. If the urine has spread beyond the visible stain, you may need to treat an area slightly larger than the spot you can see.

Avoid using a steam cleaner on untreated urine stains. Heat can make some urine-related residues harder to remove.

For older stains, check whether the smell is coming from the carpet itself or the padding beneath it. If the padding is heavily contaminated, surface cleaning alone may not permanently remove urine smell from the carpet.

How to Clean Pet Urine From Hardwood and Tile Floors

Clean pet urine on hard floors quickly, but the right method depends on the flooring material.

For sealed hardwood, blot the accident immediately and clean the area with a product approved for finished wood floors. Avoid soaking the surface or leaving cleaning solutions sitting on it, since moisture can damage the finish and seep between floorboards.

If urine has entered the seams or penetrated unfinished wood, the smell may remain after cleaning. In severe cases, professional floor treatment or replacement of affected materials may be necessary.

Tile floors are generally more resistant to liquid, but grout lines can absorb urine. Clean the tile and grout with a product suitable for both surfaces, and follow any recommended rinsing and drying steps.

Never mix bleach with ammonia or other household cleaners. Certain cleaning chemicals can create dangerous fumes when combined.

What to Do When Urine Odor Keeps Coming Back

If a room smells clean immediately after washing but develops a urine odor again a few days later, some residue may still be present.

Start by checking nearby surfaces. Urine can spread farther than the original stain, especially on carpets, along baseboards, or underneath furniture. A UV inspection light may help reveal some older urine stains, although not every stain will be visible under ultraviolet light.

If you’ve already treated the area, check whether the cleaning product had enough contact time to work. Some enzymatic cleaners require longer treatment times, and heavily affected areas may need another application, depending on the label.

Persistent odors can also come from carpet padding, subflooring, or other materials that ordinary surface cleaning can’t reach.

If your pet repeatedly urinates in the same place, consider whether an underlying behavioral or medical issue is involved. Sudden changes in bathroom habits, especially in a previously house-trained pet, deserve a conversation with your veterinarian.

What Is the Best Way to Remove Strong Pet Odors?

Strong pet odors usually mean the smell has been building up for some time or has reached materials that are difficult to clean. Carpets, upholstery cushions, and unfinished wood can absorb liquids and oils, so odors can linger even after you wipe the surface down.

Start by identifying where the smell is strongest. Check pet sleeping areas, carpets near doorways, furniture cushions, and corners where accidents may have happened. If the odor is concentrated in one spot, treat that area with a cleaner designed for the material and the type of mess.

Enzymatic cleaners are often a good choice for urine and other organic pet stains. However, they may not solve every odor problem. If urine has soaked through carpet padding or into the subfloor, the affected materials may need specialized treatment or replacement.

Avoid relying on scented sprays, candles, or strong fragrances to cover the smell. These products may temporarily change how a room smells, but they don’t remove the residue causing the odor. Some essential oils and fragranced products can also harm pets, so check their safety before using them.

If the smell remains after repeated, appropriate cleaning, you may need a professional carpet or odor-removal specialist. Strong odors that have penetrated several layers of material are often beyond what ordinary household cleaning can address.

How to Prevent Pet Odors From Returning

Once you’ve removed the existing odors, regular maintenance can help keep them from coming back. You don’t need to deep clean your entire house every day, but staying consistent with the areas your pets use most can prevent smells from becoming difficult to manage.

Vacuum carpets and furniture regularly, wash pet bedding weekly or as needed, and wipe down hard floors where your pets spend time. Clean accidents immediately rather than waiting until your next scheduled cleaning day.

Pet grooming also makes a difference. Brushing removes loose fur before it spreads throughout your home, while bathing when appropriate for your pet’s breed and coat can help control odors from skin oils and dirt. Ask your veterinarian or groomer about a suitable bathing schedule, rather than washing your pet too often.

For cat owners, scoop litter boxes daily and replace litter according to the product instructions. Wash the litter box periodically with a suitable cleaner and dry it before adding fresh litter. Keeping the box in a well-ventilated area can also help reduce lingering smells.

Wash pet toys, blankets, and washable furniture covers regularly. If your pet spends a lot of time on the sofa, placing a washable throw over their favorite spot can help protect the upholstery underneath.

A consistent weekly cleaning schedule can make these tasks easier to manage. Focus on the rooms your pets use most, then adjust how often you clean based on shedding, accidents, and household activity.

When Should You Hire a Professional Cleaning Service for Pet Odors?

Regular cleaning can handle much of the hair, dander, and everyday dirt that pets leave behind. However, keeping up with those tasks isn’t always easy, especially in homes with several pets, busy schedules, or heavily used carpets and furniture.

Professional house cleaning can help with the general buildup that contributes to pet odors. Vacuuming accessible surfaces, cleaning floors, removing dust, and washing appropriate household surfaces can make your home feel fresher and reduce debris buildup over time.

A deeper cleaning may also be helpful when routine cleaning has fallen behind. Areas around baseboards, under furniture, and other overlooked spaces can collect pet hair and dirt that contribute to lingering smells. Following professional house cleaning tips can help you tackle these areas more thoroughly between scheduled cleanings.

However, standard house cleaning and specialized pet odor removal are different services. If urine has penetrated carpet padding, subfloors, or upholstery cushions, you may need a carpet cleaning or odor remediation specialist.

Before booking, explain the odor problem and ask which cleaning tasks are included. This helps you choose a service that matches your home’s condition without expecting ordinary cleaning to fix damage beneath the surface.

Keep Your Home Fresh With Tidy Cleaning Services

Sharing your home with pets shouldn’t mean putting up with constant odors. Promptly cleaning accidents, washing pet bedding, and keeping floors and furniture free of hair and dirt can make a noticeable difference.

If you’re having trouble keeping up with everyday cleaning, Tidy Cleaning Services can help you maintain a cleaner, more comfortable home. Our residential cleaning services help you stay on top of dust, pet hair, and everyday dirt, making it easier to keep your home fresh between cleanings.

Contact Tidy Cleaning Services to schedule your next house cleaning and spend less time cleaning up after your pets.

How to Keep Your Bathroom Cleaner for Longer

How to Keep Your Bathroom Cleaner for Longer

Bathrooms are among the most-used rooms in any home, which means they can quickly become some of the hardest to keep clean. Toothpaste splatters, soap scum, water spots, and moisture build up every day, making it easy for grime to take over if you don’t stay on top of it. The good news is that keeping your bathroom clean doesn’t require hours of scrubbing every week.

Keeping your bathroom cleaner starts with a few simple habits and a routine you can realistically stick to. Small changes, like wiping down wet surfaces and staying ahead of soap scum, can make a big difference over time. This article explains why bathrooms get dirty so quickly, practical ways to keep them cleaner, and the maintenance habits that help prevent buildup before it starts.

Why Bathrooms Get Dirty So Quickly

Bathrooms deal with constant moisture, frequent use, and limited ventilation. You use the shower, sink, and toilet multiple times a day, leaving behind water, soap residue, toothpaste, and bacteria. Unlike other rooms in your home, bathrooms create the perfect conditions for buildup to happen quickly.

Knowing what causes that buildup is the first step toward preventing it and making regular cleaning much easier.

Moisture Creates the Perfect Environment for Mold

Every hot shower fills your bathroom with humidity. If you don’t remove that moisture, it settles on walls, mirrors, grout, ceilings, and other surfaces. Over time, damp conditions create the ideal environment for mold and mildew to grow.

One of the easiest ways to prevent bathroom mold is by reducing moisture after every shower. Running the exhaust fan, opening a window when possible, and wiping down wet surfaces all help remove excess humidity before it becomes a problem.

Pay close attention to grout lines, shower corners, and around the bathtub, since these areas tend to stay damp the longest.

Soap Scum, Toothpaste, and Hard Water Build Up Quickly

Many everyday products leave residue behind.

Soap combines with minerals in water to create soap scum on shower walls and glass doors. Toothpaste dries on sinks and faucets, while hard water leaves mineral deposits that become more noticeable over time.

These deposits don’t usually appear overnight. Instead, they slowly build up after each use. Regular cleaning prevents these layers from becoming harder to remove and keeps your bathroom looking cleaner between more detailed cleanings.

Daily Use Makes Bathrooms One of the Hardest Rooms to Maintain

Unlike a guest room that may only be used occasionally, your bathroom is constantly in use. Family members wash their hands, brush their teeth, shower, style their hair, and get ready for the day, often within the same few hours.

With so much daily activity, it’s normal for mirrors to collect fingerprints, countertops to become cluttered, and floors to gather dust, hair, and water.

The key isn’t keeping your bathroom spotless at all times. Instead, focus on preventing small messes from turning into larger cleaning projects.

Build a Bathroom Cleaning Routine That Works

One of the best ways to keep your bathroom cleaner is by breaking tasks into manageable steps. Instead of waiting until the room feels dirty, spread cleaning throughout the week. A consistent bathroom cleaning routine helps prevent buildup, saves time, and makes each cleaning session easier.

The exact schedule may vary depending on how many people use your bathroom, but most homes benefit from a combination of daily, weekly, and monthly tasks.

Daily Bathroom Cleaning Tasks

Daily maintenance only takes a few minutes and helps prevent dirt, moisture, and clutter from building up.

Simple habits include:

  • Wipe the sink and faucet after brushing your teeth.
  • Hang towels so they can dry completely.
  • Squeegee or wipe down shower walls and glass doors after showering.
  • Put toiletries back in their designated place.
  • Empty the trash if it’s full.
  • Quickly wipe away spills or splashes around the sink.

These small habits may take only two to five minutes, but they can significantly reduce the scrubbing you’ll need later.

Weekly Bathroom Cleaning Tasks

Weekly cleaning focuses on removing the dirt and bacteria that naturally build up over several days of use.

Set aside time each week to:

  • Clean and disinfect the toilet.
  • Scrub the sink and countertop.
  • Clean mirrors.
  • Wipe cabinet fronts.
  • Clean the shower or bathtub.
  • Vacuum or sweep the floor.
  • Mop hard flooring.
  • Empty the trash and replace the liner.

Sticking to a weekly routine helps prevent soap scum, hard water stains, and grime from becoming more difficult to remove.

Monthly Bathroom Maintenance Tasks

Some areas don’t need weekly attention, but you shouldn’t forget them. Monthly maintenance helps keep your bathroom functioning properly while preventing hidden dirt from accumulating.

Once a month, remember to:

  • Dust and clean the exhaust fan cover.
  • Wash or replace the shower curtain liner if needed.
  • Scrub grout lines.
  • Wipe baseboards.
  • Clean behind the toilet.
  • Check caulk around the sink, shower, and tub for signs of mold or damage.

Adding these tasks to your monthly routine helps keep your bathroom in better condition and reduces the need for intensive cleaning later.

Bathroom Cleaning Tips That Keep It Cleaner Longer

Keeping your bathroom clean isn’t about spending more time scrubbing. It’s about preventing messes before they build up. A few simple habits can make a noticeable difference in how your bathroom looks and how often you need to clean it.

If you’re looking for practical bathroom cleaning tips, start with the habits below. They’re easy to add to your routine and can help keep your bathroom looking fresh between regular cleanings.

Wipe Down Wet Surfaces After Every Shower

One of the easiest ways to keep your bathroom cleaner is to remove excess moisture before it dries.

Use a squeegee or microfiber cloth to wipe down shower walls, glass doors, and faucets after each shower. This takes only a minute or two but helps prevent soap scum, hard water stains, and water spots.

If wiping everything down after every shower isn’t realistic, aim to do it a few times each week. Even small efforts can reduce buildup over time.

Improve Airflow to Prevent Bathroom Mold

Bathrooms hold onto moisture longer than most other rooms, especially if they don’t have good ventilation. The longer humidity lingers, the more likely mold and mildew are to develop.

To help prevent bathroom mold, run your exhaust fan during every shower and leave it on for about 20 minutes afterward. If your bathroom has a window, open it when weather permits to improve airflow and help surfaces dry faster.

You can also leave the shower door or curtain partially open after bathing. This allows air to circulate inside the shower and reduces trapped moisture.

Keep Countertops Free of Clutter

The more items you keep on your bathroom counter, the harder it becomes to clean around them.

Store everyday products in cabinets or drawers whenever possible. Keeping only the items you use most often on the countertop makes it quicker to wipe surfaces each day and helps your bathroom look cleaner overall.

An organized countertop also makes it easier to spot toothpaste splatters, dust, or water spots before they build up.

Replace Towels and Bath Mats Regularly

Towels and bath mats absorb moisture every day, making them one of the easiest places for bacteria and odors to develop.

Replace hand towels every few days, especially in busy households where they’re used frequently. Wash bath towels regularly according to the manufacturer’s care instructions, and clean bath mats often to prevent dirt, moisture, and mildew from building up.

Fresh towels and clean bath mats not only improve hygiene but also help your bathroom feel cleaner overall.

Common Bathroom Cleaning Mistakes to Avoid

Even with a regular cleaning routine, a few common mistakes can make it harder to keep your bathroom looking its best. Avoiding these habits can save time and reduce scrubbing over time.

Waiting Too Long Between Cleanings

One of the biggest mistakes homeowners make is waiting until the bathroom looks dirty before cleaning it.

Soap scum, toothpaste, and hard water stains become more difficult to remove the longer they sit. Regular bathroom cleaning helps prevent buildup and keeps surfaces looking fresh with less effort.

Small, consistent cleaning sessions are usually much easier than trying to tackle weeks of accumulated grime all at once.

Ignoring Grout and Caulk

Grout lines and caulk are easy to overlook because they’re not the first things you notice when walking into a bathroom. However, they’re also some of the most common places for mold, mildew, and discoloration to develop.

Take a few minutes each month to inspect these areas and clean them as needed. If you notice cracked or damaged caulk, replacing it promptly can help prevent moisture from getting behind walls or around fixtures.

Using the Wrong Cleaning Products

Not every cleaner works well on every surface.

Using abrasive scrubbers on glass, natural stone, or polished fixtures can leave scratches behind. Likewise, using the wrong product for soap scum or hard water stains may leave residue without solving the problem.

Always read product labels and choose cleaners designed for the surfaces you’re treating. Pairing the right product with the right tool often produces better results while protecting your bathroom finishes.

When It’s Time for a Deep Bathroom Cleaning

Even the best bathroom cleaning routine can’t prevent every type of buildup. Over time, certain areas need more attention than a quick weekly cleaning can provide.

You may want to schedule a deep bathroom cleaning session if you notice:

  • Soap scum that doesn’t wipe away easily
  • Hard water stains on fixtures or glass
  • Mold or mildew returning repeatedly
  • Grout that looks discolored
  • Lingering odors
  • Dirt collecting behind the toilet or around the baseboards

A deep cleaning focuses on areas often skipped during routine maintenance, helping restore your bathroom to a cleaner, fresher condition.

If your bathroom hasn’t had a thorough cleaning in several months, it may be worth setting aside extra time or considering professional help to tackle stubborn buildup.

Keep Your Bathroom Cleaner With Tidy Cleaning Services

A clean bathroom doesn’t happen by accident. It comes from consistent habits, regular maintenance, and addressing small messes before they become bigger cleaning projects. By following a simple routine and using the right cleaning techniques, you can spend less time scrubbing and more time enjoying a fresh, comfortable home.

At Tidy Cleaning Services, we help homeowners keep bathrooms cleaner with recurring and deep-cleaning services tailored to their needs. Our experienced team cleans the areas that are used every day, as well as the spots that are easy to overlook during routine maintenance.

Whether you’re looking for ongoing cleaning services or need help getting your bathroom back to its best, Tidy Cleaning Services is here to help. Contact us today to learn more about our professional residential cleaning services.

The Health Benefits of a Clean Home

The Health Benefits of a Clean Home

Keeping your home clean does more than make it look nice. It also helps create a healthier environment for you and your family. Dust, germs, clutter, and allergens can build up over time, affecting everything from the air you breathe to how you feel throughout the day.

A few simple cleaning habits can go a long way. Whether you clean yourself or use recurring house cleaning services, keeping your home clean can improve your health, reduce everyday stress, and make your space more comfortable. In this article, we’ll explain why that matters and share practical ways to keep your home healthier.

Why a Clean Home Matters for Your Health

Many people think of cleaning as a way to make their home look nicer, but its benefits go much further. A clean home helps remove dust, bacteria, allergens, and clutter that can affect your health and comfort over time.

Your home is where you eat, sleep, relax, and spend time with your family. As you go about your daily routine, you track dirt inside, dust settles on surfaces, and germs collect on items you touch every day. Without regular cleaning, these things keep building up, making your home less comfortable and potentially affecting your health.

A clean home also supports your daily routine. It’s easier to prepare meals in a clean kitchen, relax in an organized living room, and get a good night’s sleep in a tidy bedroom. Instead of feeling distracted by clutter or worrying about chores piling up, you can spend more time enjoying your space.

This is why cleaning is important. It’s not about creating a picture-perfect home. It’s about creating a healthier place to live that supports your physical health, reduces everyday stress, and makes daily life a little easier.

A Cleaner Home Can Improve Your Physical Health

Regularly cleaning your home does more than remove visible dirt. It also helps eliminate things you can’t always see, such as dust, bacteria, allergens, and mold spores. While no home can be completely free of these contaminants, consistent cleaning helps keep them under control.

Here are three ways a cleaner home can support your physical health.

Reduces Allergens and Improves Indoor Air Quality

Dust is more than just dirt collecting on furniture. It often contains pollen, pet dander, dead skin cells, and other tiny particles that circulate throughout your home. Over time, these allergens settle into carpets, rugs, upholstered furniture, bedding, and even air vents.

Without regular cleaning, they keep building up and become airborne every time someone walks through the room or sits on the couch.

Vacuuming floors, dusting with microfiber cloths, washing bedding, and cleaning vents all help improve indoor air quality by reducing these particles before they spread throughout your home.

If someone in your household has allergies, asthma, or pets, maintaining a regular cleaning routine can make your living space more comfortable and help reduce common allergy triggers.

Helps Prevent the Spread of Germs

Every day, your family touches dozens of surfaces without thinking about it. Kitchen counters, refrigerator handles, bathroom faucets, light switches, remote controls, and doorknobs all collect germs through normal daily use.

Regularly cleaning and disinfecting these high-touch surfaces helps reduce the spread of bacteria and viruses throughout your home. Kitchens and bathrooms deserve extra attention because moisture, food residue, and frequent use create conditions where germs can multiply more easily.

Good cleaning habits are especially important during cold and flu season or when someone in your home is sick. While cleaning can’t prevent every illness, it can reduce the number of germs that remain on frequently used surfaces.

Creates a Safer Living Environment

One often-overlooked benefit of a clean house is safety.

Clutter left on stairs, hallways, or entryways can become a tripping hazard. Wet bathroom floors increase the risk of slipping, while food crumbs left behind may attract insects or rodents. Excess moisture around sinks, tubs, and showers can also encourage mold growth if you don’t clean it regularly.

Cleaning your home gives you the opportunity to spot small problems before they become bigger ones. While completing your regular routine, you may notice a leaking pipe, damaged caulk around the shower, or signs of mold. Addressing these issues early can help protect both your home and your family’s health.

Does Having a Clean Room Help Mental Health?

Yes, your environment can affect how you feel. While keeping a room clean isn’t a treatment for mental health conditions, an organized, clutter-free space can help reduce everyday stress and make it easier to focus and relax. A clean room also creates a more comfortable environment for working, sleeping, and spending time at home.

Reduces Stress and Anxiety

Walking into a cluttered room can feel overwhelming, especially after a long day. Dishes in the sink, laundry waiting to be folded, or papers covering the kitchen table can constantly remind you of unfinished tasks.

Cleaning and organizing your space helps reduce visual clutter, making your home feel calmer and more relaxing. Even 10 or 15 minutes of tidying can create a greater sense of control and accomplishment.

A clean room does more than improve your home’s appearance. It creates a space that’s easier to relax in, easier to stay organized, and more enjoyable to use every day. While cleaning isn’t a replacement for mental health care, maintaining an organized environment can support your overall well-being.

Helps You Stay Focused and Productive

Whether you’re working from home, helping your children with homework, or simply managing your daily responsibilities, it’s often easier to focus in a clean environment.

Clutter competes for your attention, making it harder to concentrate on the task in front of you. Organized spaces remove unnecessary distractions and make it easier to find what you need, saving time throughout the day.

Simple habits like clearing your desk, putting items back where they belong, and keeping countertops clutter-free can help your home feel more organized and functional.

Can Support Better Sleep

Your bedroom should be a place where you can relax at the end of the day. However, piles of laundry, dusty furniture, and cluttered nightstands can make the space feel less peaceful.

Keeping your bedroom clean by vacuuming regularly, washing bedding, dusting surfaces, and putting away clutter creates a more comfortable environment for rest. A tidy bedroom can also make it easier to stick to a bedtime routine, helping you wind down more easily each night.

Creating a clean, relaxing sleep environment is one of the simplest healthy home tips you can add to your daily routine.

Healthy Home Habits That Make Cleaning Easier

Keeping your home clean doesn’t mean spending hours cleaning every day. The key is building simple habits that prevent dirt and clutter from piling up. Small tasks completed consistently are often more effective than waiting until your home needs a full day of cleaning.

These healthy home tips can help you maintain a cleaner living space while making your weekly routine much more manageable.

Stick to a Weekly Cleaning Routine

One of the easiest ways to maintain a healthy home is by following a regular cleaning schedule. Instead of cleaning the entire house at once, spread tasks throughout the week.

For example, you might vacuum on Monday, clean the bathrooms on Wednesday, and dust the bedrooms on Friday. Breaking chores into smaller tasks makes cleaning feel less overwhelming and helps every room receive regular attention.

A weekly routine also prevents dirt, dust, and clutter from building up, which means you’ll spend less time scrubbing and more time maintaining your home.

Don’t Wait for Dirt to Build Up

It’s much easier to clean small messes than tackle weeks of buildup.

Wipe kitchen counters after preparing meals, rinse the shower after use, and clean spills as soon as they happen. These simple habits take only a few minutes but help prevent stains, odors, and grime from becoming harder to remove.

Even with a consistent routine, every home benefits from an occasional deep cleaning. Areas like baseboards, window tracks, ceiling fans, and behind furniture collect dust over time and often need more attention than regular cleaning provides.

Focus on High-Touch Surfaces

Some surfaces in your home are touched dozens of times every day, making them important places to include in your cleaning routine.

Make time to regularly clean and disinfect:

  • Light switches
  • Door handles
  • Cabinet pulls
  • Refrigerator handles
  • Bathroom faucets
  • Countertops
  • Remote controls
  • Appliance handles

Cleaning these frequently touched surfaces helps reduce germ spread and keeps your home healthier for everyone.

When Recurring House Cleaning Can Improve Your Routine

Life gets busy, and even the best cleaning routine can be difficult to maintain. Work schedules, family activities, travel, and other responsibilities often leave little time for household chores. When cleaning falls behind, dirt, dust, and clutter can build up quickly.

This is where recurring house cleaning can make a difference. Instead of trying to catch up every weekend, regular professional cleanings help keep your home healthier while giving you more time to focus on what matters most.

Busy Professionals and Families

Balancing work, school, appointments, and family time leaves little room for deep cleaning every week.

Recurring cleaning services help busy households stay ahead of everyday messes by keeping kitchens, bathrooms, bedrooms, and living areas consistently clean. Instead of spending your weekends catching up on chores, you can spend that time with your family or doing the activities you enjoy.

Homes With Pets or Young Children

Pets and children bring plenty of joy to a home, but they also create extra cleaning challenges.

Pet hair, muddy paws, fingerprints, food spills, and toys scattered throughout the house can make it difficult to keep up with daily cleaning. Regular professional cleanings help manage these ongoing messes while reducing dust, dander, and allergens that can affect indoor air quality.

Anyone Looking for a Healthier Living Space

You don’t need a busy schedule to benefit from recurring cleaning.

Many homeowners choose recurring service because they want to maintain a cleaner, healthier home year-round. Regular cleaning reduces dust, allergens, bacteria, and everyday buildup before they become bigger problems.

Whether you schedule weekly, biweekly, or monthly visits, consistent cleaning makes it easier to enjoy the long-term health benefits of a clean home without feeling overwhelmed by household chores.

Enjoy the Health Benefits of a Clean Home With Tidy Cleaning Services

A clean home does more than improve appearances. It creates a healthier environment by reducing allergens, limiting the spread of germs, supporting better indoor air quality, and providing a more comfortable place to relax and spend time with your family. When cleaning becomes part of your regular routine, it’s easier to enjoy all the benefits of a clean house while preventing dirt and clutter from building up.

At Tidy Cleaning Services, we help homeowners maintain healthier homes with recurring cleaning, one-time cleaning, and deep cleaning services tailored to their needs. Whether you’re looking for ongoing support or need help getting your home back on track, our experienced team is committed to delivering reliable, high-quality cleaning services.

If you’re ready to enjoy the health benefits of a clean home without adding more to your busy schedule, contact Tidy Cleaning Services today. We’ll help you find a cleaning plan that keeps your home fresh, comfortable, and healthier year-round.

How to Clean Your House Like a Professional From Start to Finish

How to Clean Your House Like a Professional From Start to Finish

Cleaning your home doesn’t have to feel overwhelming or take up your entire weekend. Professional cleaners don’t rely on expensive products or complicated techniques. Instead, they follow an organized process that helps them clean thoroughly and efficiently. Learning how to clean your house like a professional can help you save time, avoid common mistakes, and keep your home looking its best between deep cleanings.

In this guide, you’ll learn how to create a cleaning plan, gather the right supplies, clean each room efficiently, and adopt the habits professionals use to maintain consistently clean homes.

Start With a Cleaning Plan

One of the biggest differences between homeowners and professional cleaners is that professional cleaners have a plan before getting started. Rather than cleaning whatever catches their eye, professionals work through the home in a consistent order to avoid missing areas or cleaning the same surface twice.

Before you begin:

  • Declutter each room by putting away loose items.
  • Empty trash cans.
  • Make a list of the rooms you plan to clean.
  • Decide whether you’ll clean the entire house in one day or spread tasks throughout the week.
  • Gather all your supplies before you begin.

Having a simple strategy keeps you focused and makes cleaning your house more efficient.

If you’re trying to stay on top of routine chores, following a weekly cleaning schedule can help prevent dirt and clutter from becoming overwhelming.

Gather the Right Cleaning Supplies Before You Start

Professional cleaners don’t necessarily use dozens of specialized products. Instead, they rely on a handful of versatile tools that can tackle most surfaces throughout the home.

Keeping these supplies together in a portable cleaning caddy also saves time since you won’t need to search for products from room to room.

Some essentials include:

  • Microfiber cloths
  • All-purpose cleaner
  • Glass cleaner
  • Bathroom cleaner
  • Disinfectant spray
  • Vacuum with attachments
  • Mop and bucket
  • Scrub brushes
  • Sponges
  • Rubber gloves
  • Trash bags

Microfiber cloths are especially useful because they trap dust rather than simply move it around. A vacuum with attachments also helps clean baseboards, vents, furniture, and other often-overlooked areas.

Using quality supplies won’t replace good cleaning habits, but it can make the job faster and produce better results.

The Most Efficient Way to Clean Your Home

If you’ve ever wondered why professional cleaners finish an entire house so quickly, it’s because they follow a consistent workflow.

The first rule is to clean from top to bottom. Dust ceiling fans, shelves, and countertops before vacuuming or mopping the floors. This prevents dust from falling onto surfaces you’ve already cleaned.

The second rule is to clean from dry to wet. Dusting and vacuuming first removes loose debris before you start wiping surfaces with cleaners.

Finally, complete one room before moving on to the next. Jumping between rooms often wastes time and makes it easier to overlook tasks.

Following the same process every time also helps build a routine. Before long, you’ll spend less time deciding what to clean next and more time making steady progress.

Professional House Cleaning Tips That Save Time

Learning how to clean your house like a professional isn’t just about using the right products. Professional cleaners rely on simple habits that help them work faster, stay organized, and achieve consistent results. These professional house-cleaning tips can help you clean more efficiently while improving overall results.

  • Let Cleaning Products Do the Work – One of the biggest mistakes homeowners make is spraying a surface and immediately wiping it away. Most disinfectants and bathroom cleaners need several minutes to break down grease, soap scum, and bacteria. Always follow the product’s instructions for the recommended dwell time before scrubbing or wiping.
  • Use Microfiber Cloths Instead of Paper Towels – Microfiber cloths trap dust, dirt, and bacteria more effectively than paper towels. They’re reusable, less likely to leave streaks behind, and work well on everything from countertops to mirrors.
  • Carry Your Supplies From Room to Room – Professional cleaners don’t stop to search for products every few minutes. Keeping your supplies in a portable cleaning caddy saves time and helps you move efficiently from one room to the next.
  • Finish One Room Before Starting Another – It’s easy to get distracted while cleaning, but jumping between rooms often leaves tasks unfinished. Completing one room at a time keeps you organized and provides a sense of progress.
  • Vacuum Before Mopping – Always remove dust, crumbs, and debris before mopping. Vacuuming first prevents dirt from turning into muddy streaks on hard floors and helps keep them cleaner.
  • Use Different Cloths for Different Areas – Avoid using the same cloth in the kitchen and bathroom. Color-coding your microfiber cloths can help reduce cross-contamination and improve overall hygiene.

How to Clean Every Room Like a Professional

Each room in your home has different cleaning needs. Professionals adjust their approach based on the surfaces, level of use, and areas where dirt tends to accumulate.

Kitchen

The kitchen is one of the busiest rooms in any home, so it usually requires the most attention.

Start by clearing countertops and putting away dishes. Wipe down cabinets, countertops, and backsplashes before cleaning appliances such as the microwave, stovetop, and refrigerator. Finish by disinfecting the sink and mopping the floor.

Pay special attention to cabinet handles, appliance buttons, and faucet handles since they’re touched frequently throughout the day.

Bathrooms

Bathrooms should be cleaned using products designed to remove soap scum, hard water stains, and bacteria.

Allow cleaning products to sit on toilets, tubs, and showers for a few minutes before scrubbing. This gives them time to break down buildup and reduces the amount of scrubbing required.

Finish by cleaning mirrors, disinfecting countertops and sinks, wiping fixtures, and mopping the floor.

Using separate cloths for bathrooms and kitchens also helps prevent cross-contamination.

Bedrooms

Bedrooms usually stay cleaner than other areas of the home, but they still collect dust quickly.

Begin by making the bed and putting away clutter. Dust furniture, shelves, lamps, and windowsills before vacuuming carpets or mopping hard floors.

Don’t forget to clean underneath the bed occasionally, as it can collect dust, pet hair, and allergens over time.

Changing bedding weekly also helps create a cleaner, more comfortable sleeping environment.

Living Areas

Living rooms often see the most daily traffic, making them magnets for dust, crumbs, and pet hair.

Start by straightening blankets and pillows before dusting furniture, electronics, shelves, and decorative items. Vacuum rugs, upholstery, and beneath furniture whenever possible.

Finally, clean glass tables, wipe high-touch surfaces like light switches and remote controls, and mop hard floors to leave the room looking fresh.

How Professionals Keep Homes Clean Longer

Professional cleaners know that maintaining a clean home is easier than constantly trying to catch up. Small daily habits can dramatically reduce the amount of time spent cleaning each week.

Some of the most effective professional house cleaning tips include:

  • Clean spills as soon as they happen.
  • Put items back where they belong after using them.
  • Wipe kitchen counters every evening.
  • Keep bathroom sinks dry to reduce water spots.
  • Vacuum high-traffic areas regularly.
  • Avoid letting clutter accumulate on countertops and tables.

Following a consistent weekly cleaning schedule also helps prevent dirt from building up and reduces the need for marathon cleaning sessions.

Even with a good routine, most homes benefit from an occasional deep cleaning to tackle areas that aren’t part of regular maintenance, such as baseboards, window tracks, and behind furniture.

When Professional House Cleaning Is the Smarter Choice

Learning how to clean your house is valuable, but there are times when hiring professionals simply makes more sense.

You may benefit from professional cleaning if:

  • Your schedule leaves little time for housework.
  • You’re preparing for guests or a special event.
  • You’re moving into or out of a home.
  • You want a thorough deep cleaning.
  • You have pets or young children that make cleaning more frequent.
  • You’d rather spend your weekends doing something else.

Professional cleaners bring experience, efficient processes, and specialized equipment that can often produce better results in less time.

For many homeowners, combining simple daily maintenance with recurring professional cleaning is the easiest way to keep a home consistently clean. Understanding when professional cleaning is worth the investment can also help you decide whether recurring service fits your lifestyle and budget.

Keep Your Home Looking Its Best With Tidy Cleaning Services

Learning how to clean your house like a professional can help you maintain a cleaner, healthier home, but keeping up with every chore isn’t always realistic. Between work, family responsibilities, and busy schedules, it’s easy for cleaning tasks to pile up.

At Tidy Cleaning Services, we help homeowners enjoy clean, comfortable homes without the stress of doing it all themselves. Whether you need recurring residential cleaning, a one-time deep cleaning, move-in or move-out cleaning, or help preparing your home for a special occasion, our experienced team is here to help.

By combining smart daily habits with professional cleaning services, you can spend less time worrying about chores and more time enjoying your home. Contact Tidy Cleaning Services today to learn more about our residential cleaning services and find a schedule that works for you.

Move-In Cleaning Checklist: What to Clean Before Unpacking

Move-In Cleaning Checklist: What to Clean Before Unpacking

Moving into a new home is exciting, but before you start unpacking boxes and arranging furniture, it’s worth taking the time to thoroughly clean the space. Even if the previous owners or tenants cleaned before leaving, dust, grime, and hidden dirt can still be left behind. Following a move-in cleaning checklist helps you start fresh and makes it easier to settle into a healthier, more comfortable home.

This guide covers everything you need to know about cleaning a home before moving in, from gathering the right supplies to efficiently tackling each room. Whether you’re planning to do the work yourself or considering professional help, you’ll know exactly how to clean a house before moving in.

Why Cleaning Before You Move In Matters

Cleaning an empty house is much easier than cleaning around furniture and packed boxes. Once everything is unpacked, reaching baseboards, closets, cabinets, and corners becomes more difficult.

Taking the time to deep-clean before moving in also gives you peace of mind. You can disinfect high-touch surfaces, remove dust from overlooked areas, and eliminate odors left behind by previous occupants.

A thorough move-in clean also gives you the opportunity to inspect the home more closely. While cleaning, you may notice maintenance issues like leaking faucets, damaged caulk, loose cabinet hardware, or signs of pests before they become larger problems.

Another advantage of cleaning before moving day is having full access to every surface. Empty rooms allow you to clean behind appliances, inside closets, along baseboards, and under sinks without having to move heavy furniture later. It’s also the ideal time to wipe shelves and cabinets before placing your belongings inside.

Before You Start Cleaning

Before you begin your move-in cleaning checklist, take a few minutes to prepare the home.

  • Turn on utilities if possible.
  • Open windows for ventilation.
  • Complete any repairs or painting first.
  • Remove any leftover belongings or debris.
  • Start on the highest level of the home and work your way down if you have multiple floors.
  • Plan enough time for floors and surfaces to dry before moving furniture inside.

Spending a little time preparing can make the cleaning process smoother and help you avoid having to redo areas later.

Gather Your Cleaning Supplies First

Before you begin, gather all your cleaning supplies so you won’t have to stop halfway through the job. Having everything within reach makes the process more efficient and helps you clean each room thoroughly.

While you don’t need professional-grade equipment, using the right supplies can make the job faster and more effective. Microfiber cloths trap dust better than paper towels, disinfectants help eliminate bacteria left behind by previous occupants, and a vacuum with attachments makes it easier to clean corners, vents, and baseboards.

Basic Cleaning Supplies

These everyday products are enough for most move-in cleaning tasks:

  • All-purpose cleaner
  • Glass cleaner
  • Disinfectant spray or wipes
  • Bathroom cleaner
  • Floor cleaner
  • Microfiber cloths
  • Sponges
  • Scrub brushes
  • Paper towels
  • Trash bags

Safety Supplies

Protect yourself while cleaning, especially if the home has been vacant for a while or requires more than routine cleaning.

Consider having:

  • Rubber gloves
  • Face mask for dusty areas
  • Safety glasses if using stronger cleaning products, such as oven cleaners, bleach-based disinfectants, or heavy-duty degreasers
  • Step stool for safely reaching high shelves and cabinets

Wearing the right protective gear helps prevent skin irritation, accidental splashes, and unnecessary exposure to dust or strong cleaning fumes while you work.

Optional Tools That Save Time

A few extra tools can make your move-in cleaning list much easier to complete.

Helpful tools include:

  • Vacuum with attachments
  • Steam mop
  • Extendable duster
  • Magic erasers
  • Grout brush
  • Handheld vacuum for cabinets and drawers

Preparing everything before you start helps you move through the house without unnecessary interruptions.

Room-by-Room Move-In Cleaning Checklist

Cleaning one room at a time helps ensure nothing gets overlooked. Instead of moving randomly from space to space, complete each room before moving on to the next. This approach makes the entire project feel more manageable and helps you track your progress.

Kitchen

The kitchen should be one of the first rooms you clean since it’s where food is stored and prepared. Even if it appears clean, grease, crumbs, and bacteria may still be hiding inside cabinets, appliances, and drawers.

Your cleaning list for a new home should include:

  • Wipe inside and outside of cabinets and drawers.
  • Clean countertops and backsplash.
  • Disinfect sinks and faucets.
  • Clean inside the refrigerator and freezer.
  • Wipe the oven and stovetop.
  • Sanitize the microwave.
  • Clean pantry shelves.
  • Vacuum and mop floors.

If your refrigerator has removable shelves or drawers, wash them separately before putting food away.

Bathrooms

Bathrooms require extra attention because they’re high-moisture areas where bacteria, mildew, and soap scum can build up quickly.

Be sure to:

  • Scrub toilets.
  • Clean showers and tubs.
  • Remove soap scum.
  • Disinfect sinks and countertops.
  • Clean mirrors.
  • Wipe cabinets and drawers.
  • Sanitize faucets and handles.
  • Mop floors.

Don’t forget to replace the toilet seat if you prefer starting with a brand-new one.

Bedrooms

Bedrooms may seem clean at first glance, but they often accumulate dust when left empty between occupants.

Focus on:

  • Dusting ceiling fans.
  • Cleaning windowsills.
  • Wiping closet shelves.
  • Vacuuming carpets or mopping floors.
  • Cleaning baseboards.
  • Wiping doors and light switches.

If the home has built-in closets, vacuum every shelf and corner before placing clothing inside.

Living Areas

Living rooms, dining rooms, and hallways often accumulate dust that settles during moves or while the home is vacant.

Complete these tasks:

  • Dust all surfaces.
  • Clean windows and windowsills.
  • Wipe light switches and outlets.
  • Vacuum carpets.
  • Mop hard floors.
  • Dust ceiling fans and vents.
  • Clean baseboards and trim.

Cleaning these shared spaces first helps your home feel fresh from the moment you begin moving furniture inside.

The Most Commonly Overlooked Areas During a Move-In Clean

Even the most thorough move-in cleaning checklist can miss hidden areas where dust, grease, and allergens accumulate over time. Spending a few extra minutes on these spots can make a noticeable difference in your home’s overall cleanliness.

Don’t forget to clean:

  • Inside cabinets and drawers
  • Closet shelves
  • Behind appliances
  • Window tracks
  • Air vents
  • Ceiling fans
  • Door frames
  • Baseboards
  • Light fixtures
  • Switch plates
  • Garbage cans
  • Under sinks

These spaces may not be immediately visible, but they’re often some of the dirtiest areas in a home. If you’re planning a deep clean before moving in, they should be part of your routine.

Your Printable Move-In Cleaning Checklist

Now that you know what to clean and which areas deserve extra attention, use this move-in cleaning checklist as a quick reference before you unpack. Save it to your phone, print it out, or check off each task as you complete it.

General Preparation

  • ☐ Gather all cleaning supplies
  • ☐ Open windows for ventilation
  • ☐ Turn on utilities
  • ☐ Complete any painting or repairs
  • ☐ Remove leftover belongings and debris

Kitchen

  • ☐ Clean inside cabinets and drawers
  • ☐ Wipe countertops and backsplash
  • ☐ Disinfect the sink and faucet
  • ☐ Clean the refrigerator and freezer
  • ☐ Wipe the oven and stovetop
  • ☐ Sanitize the microwave
  • ☐ Vacuum and mop the floor

Bathrooms

  • ☐ Scrub toilets
  • ☐ Clean showers and tubs
  • ☐ Disinfect sinks and countertops
  • ☐ Clean mirrors
  • ☐ Wipe cabinets and drawers
  • ☐ Mop the floor

Bedrooms

  • ☐ Dust ceiling fans
  • ☐ Clean windowsills
  • ☐ Wipe closet shelves
  • ☐ Clean baseboards
  • ☐ Vacuum carpets or mop hard floors
  • ☐ Wipe doors and light switches

Living Areas

  • ☐ Dust furniture and shelves
  • ☐ Clean windows and windowsills
  • ☐ Wipe light switches
  • ☐ Vacuum carpets and rugs
  • ☐ Mop hard floors
  • ☐ Dust vents and ceiling fans

Final Touches

  • ☐ Replace HVAC filters if needed
  • ☐ Test smoke and carbon monoxide detectors
  • ☐ Empty all trash
  • ☐ Let floors dry completely before moving furniture inside
  • ☐ Double-check closets, cabinets, and drawers before unpacking

Should You Clean Yourself or Hire a Professional?

Many homeowners choose to handle move-in cleaning themselves, especially if the home is already in good condition. Doing it yourself can save money and allows you to work at your own pace.

However, there are situations where hiring a professional cleaning service makes more sense.

Professional move-in cleaning may be the better option if:

  • You’re moving on a tight schedule.
  • The home has been vacant for an extended period.
  • Previous occupants didn’t leave the home clean.
  • You’re managing a long-distance move.
  • You’re balancing work, family, and moving responsibilities.
  • You want every room professionally cleaned before unpacking.

The right choice depends on your schedule, the property’s condition, and the amount of cleaning required. A newer home may only need light cleaning, while an older home or rental property may require much more detailed work before it’s ready for move-in.

Professional cleaners also have the equipment and experience to clean hard-to-reach areas efficiently, helping you start with a truly fresh home while reducing one more task on your moving checklist.

When to Clean Before Moving In

The best way to clean a house before moving in is to do it while it’s still empty. Without furniture, boxes, or decorations in the way, you’ll have complete access to every room and surface.

Ideally, schedule your cleaning after any painting, flooring, or repair work is complete but before your moving truck arrives.

A simple order of operations looks like this:

  1. Finish repairs or renovations.
  2. Complete your move-in cleaning.
  3. Allow floors and surfaces to dry.
  4. Move furniture into the home.
  5. Unpack boxes.
  6. Complete light touch-ups as needed.

If your schedule allows, try cleaning one or two days before moving day. This gives you enough time to address anything you may have missed and ensures freshly cleaned floors are completely dry before furniture is brought inside.

Need Help With Your Move-In Cleaning?

Moving comes with enough responsibilities without adding an entire house cleaning project to your to-do list. While this move-in cleaning checklist can help you prepare your new home, hiring professionals can save you time and help ensure every room is ready before you unpack.

At Tidy Cleaning Services, we provide professional move-in cleaning designed to give homeowners, renters, and families a fresh start in their new space. We thoroughly clean kitchens, bathrooms, bedrooms, living areas, baseboards, cabinets, floors, and many of the often-overlooked areas that are easy to miss during a move.

Whether you’re moving into your first apartment, upgrading to a larger home, or relocating across town, our team can help make the transition easier. We also offer deep-cleaning services for homes that need extra attention, as well as recurring cleaning services to help you maintain a clean, comfortable home long after move-in day.

If you’re preparing for an upcoming move and want a spotless home before settling in, contact Tidy Cleaning Services today to schedule your move-in cleaning service.

Go to Top